

The batch, product, and process are the starting points when learning how to size a mixing tank. “We need a 2,000-litre tank” is usually the wrong starting point and can lead to inefficiencies, increased costs and downtime. The right tank size depends on how much product you need to process and how the equipment will operate.
Before ordering a mixing tank, there are several factors to consider. Working volume is the amount of liquid the tank can safely hold and operate during normal processing. Nominal volume is the tank’s stated total internal capacity based on its dimensions, before allowing for operational requirements such as headspace. Headspace is the empty space at the top of the tank that allows room for expansion, agitation, and process requirements. Another consideration is what are the preceding and following steps in the process – a smaller tank may work better because it will heat/cool/mix quicker and it can be part of a continuous batch process.
This guide covers a five-step approach to sizing a mixing tank, including practical calculations and a worked example using litres.
Start With Batch Size, Not Tank Size
When sizing a mixing tank, start with your batch volume, not the tank size. Begin with your production target per day or shift, then determine how many batches you need to complete within that timeframe. Allow for the full production cycle, including mixing, filling, discharge and cleaning in place (CIP) (does it actually need to be cleaned between batches if the product is the same, as opposed to different flavoured products mixed in the same vessel?) time, to establish the required batch volume.
Production target ÷ batches per shift = batch volume
For example, if you need to produce 4,000 litres per shift across four batches, your required batch volume is 1,000 litres.
One common mistake is oversizing a tank for “future growth” without checking whether the agitator will perform effectively at lower fill levels. Making sure the tank can mix smaller batches is easily catered for; it just needs to be identified. A larger tank does not necessarily provide a better solution if your current batch only partially fills it.
Running a mixer with insufficient liquid depth can cause shaft wobbling and bending, excessive vortexing and air entrainment, impeller splashing, vibration and structural fatigue. These issues can place additional stress on the mixer and tank components and affect mixing performance.
Size the tank around your actual process requirements first, then consider how future production increases can be accommodated.
Working Volume vs Nominal Volume
Working volume is the amount of product processed during normal operation. Nominal volume is the tank’s total internal capacity, including the space above the working liquid level needed for safe and effective operation.
A simple sizing relationship is:
Nominal volume = required batch volume ÷ working-volume factor
However, there is no universal working-volume percentage that applies to every mixing tank. The appropriate volume depends on the product, mixing process, agitation requirements, foaming, ingredient addition and the range of batch sizes required.
For example, a vessel designed to operate from full capacity down to half full may have straightforward mixing requirements. A process that needs to mix a full batch and then reliably mix a batch at only 2% of the tank’s capacity presents very different challenges. The agitator, impeller position, tank geometry and minimum liquid level all need to be considered.
Getting the volume wrong can affect production efficiency, mixing performance and operating costs. An undersized tank may require additional batches, while an oversized vessel can add unnecessary equipment and operating costs. For this reason, working volume should be determined from the actual process rather than applying a standard percentage.
How Much Headspace Does a Mixing Tank Need?
The amount of headspace required in a mixing tank depends on the product, mixing method and operating conditions. As an example, a tank may operate at around 75–85% of its nominal volume, leaving approximately 15–25% headspace. However, applications involving foaming, powder addition, high-speed mixing, or thermal expansion may require more.
Another aspect for headspace is that some products may require a blanket of inert gas such as nitrogen to avoid the product oxidising – a good product example is avocado.
Headspace requirements by process:
| Process type | Typical consideration | Why |
|---|---|---|
| Gentle blending | 15–20% | Allows room for normal mixing and movement |
| High-speed dispersion | 20–25%+ | Reduces vortexing and splashing |
| Powder-into-liquid | 20–30%+ | Allows space for powder addition and dust control |
| Foaming or boiling products | 25–40%+ | Provides additional room for foam and expansion |
| Vacuum or pressure vessels | Project-specific | Headspace and vessel design depend on operating conditions |
Headspace is the space between the working liquid level and the top of the tank. It helps accommodate vortexing, splashing, foam, powder addition, and thermal expansion during operation.
For pressure or vacuum applications, headspace should be determined as part of the overall vessel design rather than using a standard percentage.
Tank Geometry: Height-to-Diameter Ratio
Once the required liquid level is determined, the tank’s height-to-diameter ratio affects mixing performance, agitator design and overall cost. Taller tanks generally require longer shafts, additional bearing support and, in some cases, multiple impellers. Wider tanks can provide better access for cleaning and a larger surface area for heat transfer, but the mixer can require higher-powered drives due to the larger diameter impellers.
| Liquid level : diameter | Mixing behaviour | Effect on agitator and cost |
|---|---|---|
| <0.6 | Poor axial mixing | Avoid where possible |
| 0.8–1.0 | Generally ideal | Efficient mixing with a straightforward agitator |
| 1.0–1.4 | Acceptable | May require a longer shaft and additional support |
| >1.4 | More difficult to mix uniformly | A second impeller may be required |
| >2.0 | Challenging geometry | Re-evaluate the design; mixer costs can increase significantly |
The rule of thumb is 1.5 × D = H if there are no other issues, but the final geometry should be determined by the product, batch size, mixing requirements, the surface area required for heating/cooling and available space. For reference, STM designs to sheet and coil widths of 1,200, 1,500 and 2,000 mm, or increments of these.
Baffles and offset agitator mounting can both improve mixing by reducing rotational flow. Baffles are internal plates that interrupt the liquid’s circular movement and promote top-to-bottom circulation, while offset mounting positions the agitator away from the centreline, which can eliminate the need for baffles and therefore reduce the inherent cleaning issues associated with baffles.
Match the Agitator to the Volume and the Product
Viscosity, solids content and shear requirements should be considered before finalising the tank and agitator. The product and process determine how much mixing power, flow and shear are required, while tank volume and geometry influence the size and configuration of the mixer.
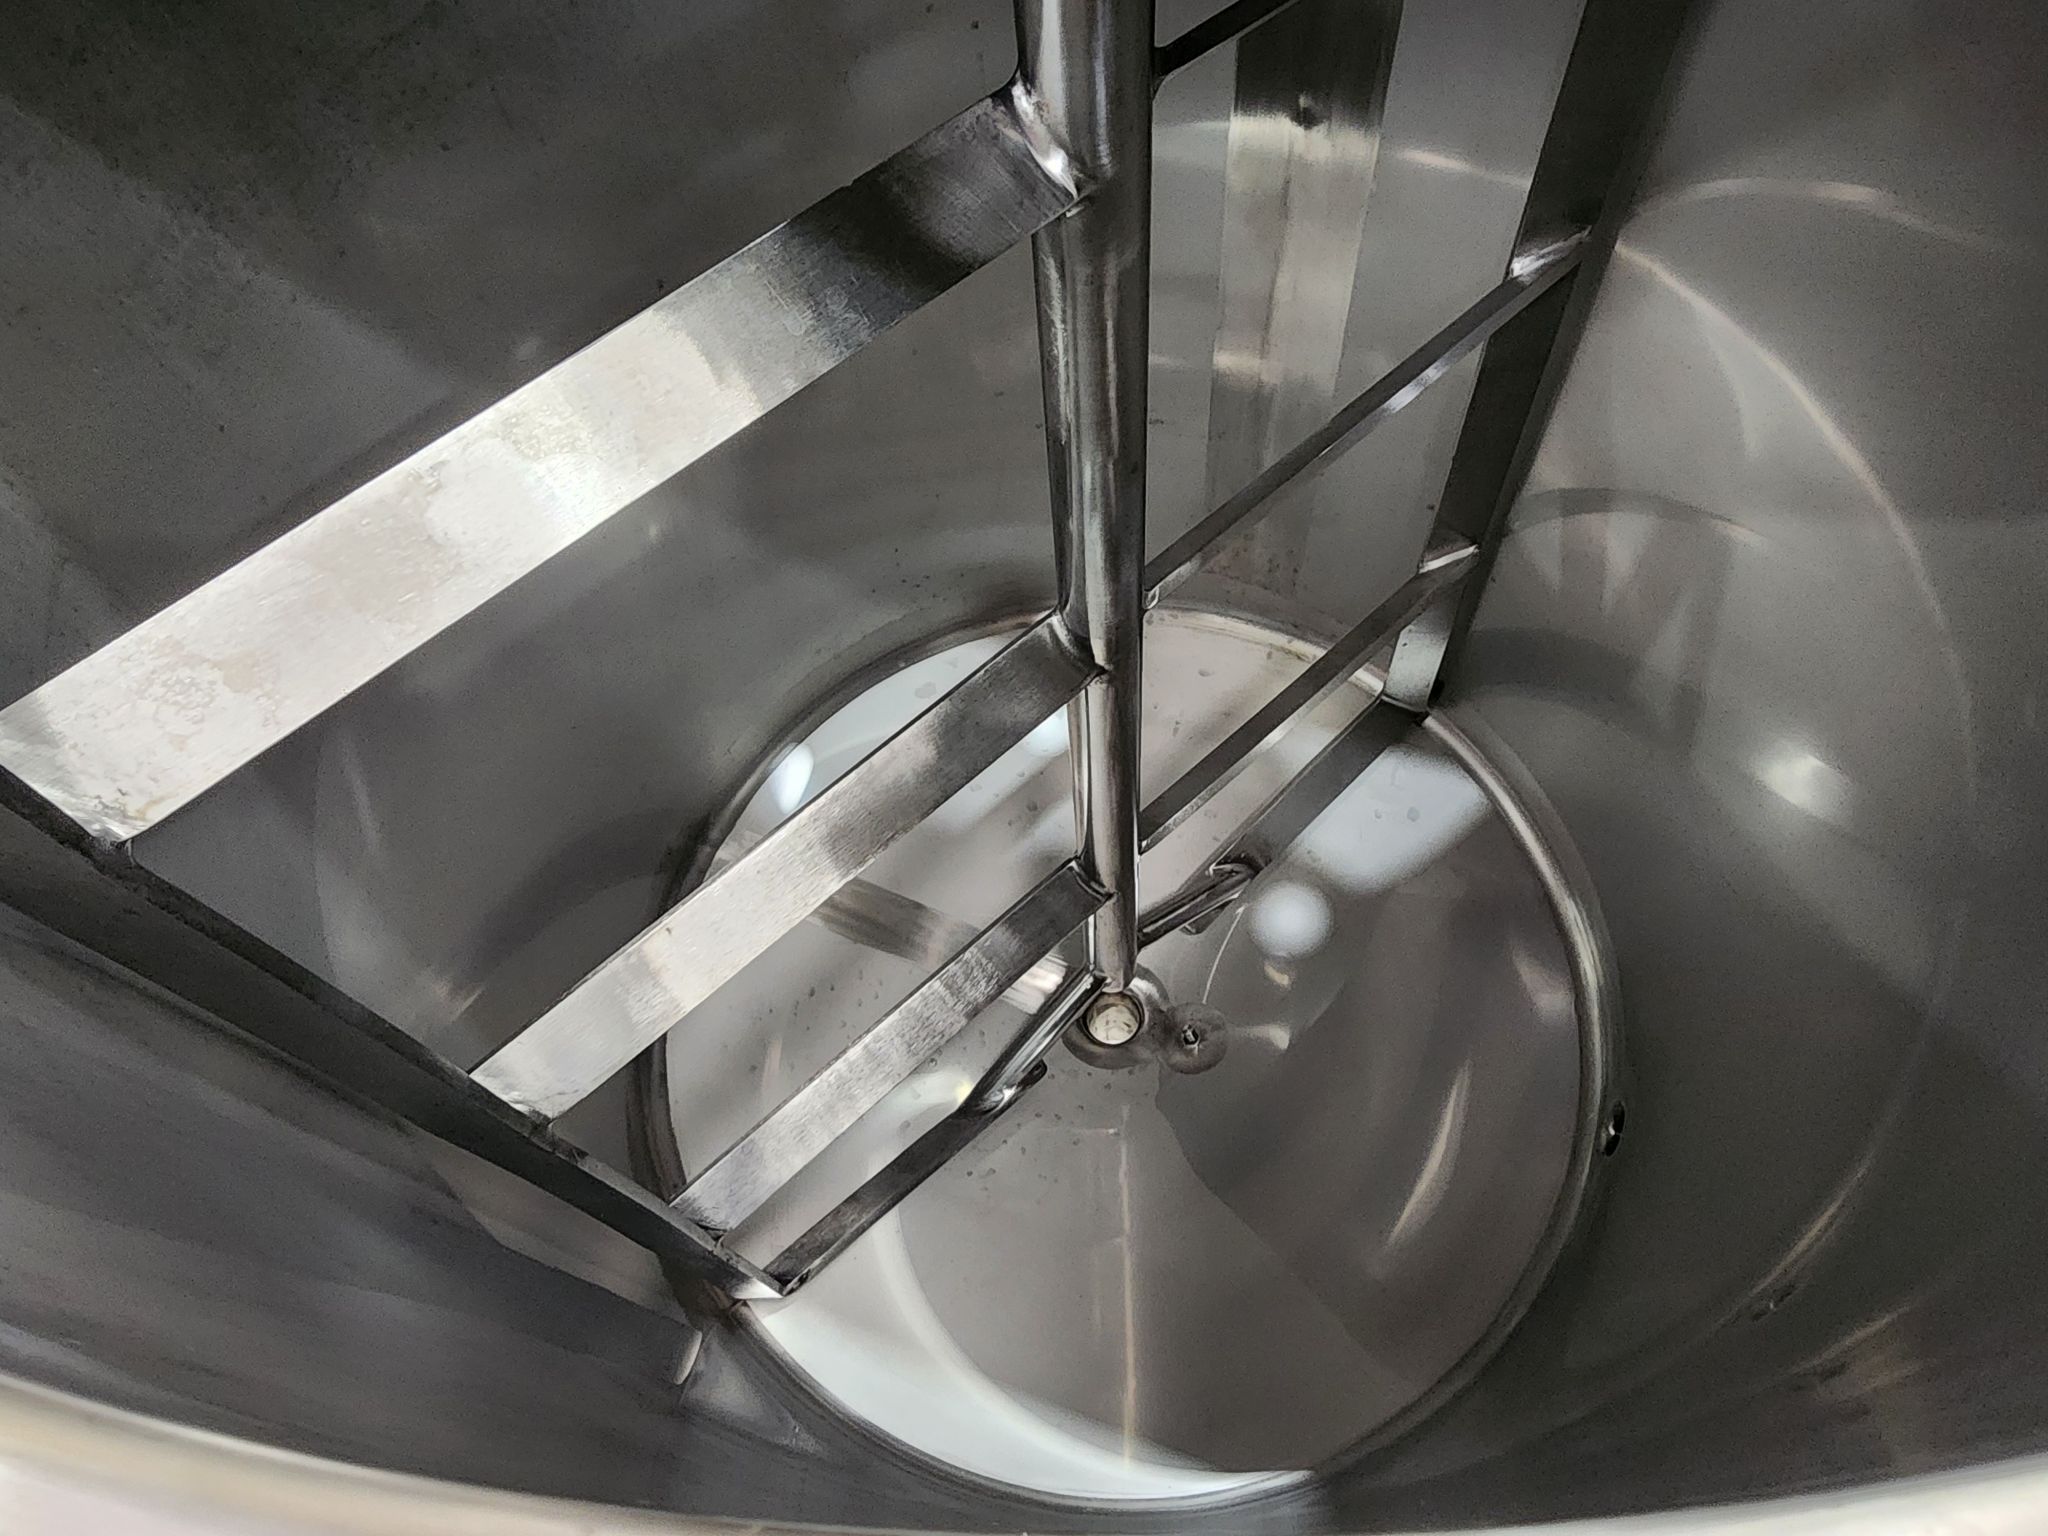
For low-viscosity liquids, top-entry agitators are commonly used to provide efficient circulation. For pharmaceutical applications, a magnetic drive mixer is often used very effectively. More viscous products may require cage or anchor mixers, while very viscous products can benefit from helical ribbon mixers designed to move higher-viscosity materials. For improved blending in viscous products, contra-rotating mixers give excellent performance, which can be additionally enhanced with an emulsifier at the bottom of the tank. For large storage tanks or applications with limited headroom, bottom or side-entry mixers can provide an alternative configuration.
As a general starting point for low-viscosity liquid blending, an impeller diameter of around one-third of the tank diameter can provide a useful balance between flow and power, but this is far too generalised. The final ratio depends on the product, tank geometry, and required mixing performance.
At STM, we custom fabricate tanks and agitator components around your process, product and production requirements.
Hygienic and Process Constraints That Change the Size
Hygienic and process requirements can affect tank dimensions, internal components and the amount of working volume required. Drainability is a key consideration in sanitary tank design. Coned, dished or sloped bottoms help direct product towards the outlet, reducing residual volume and making the tank easier to clean and empty.
CIP spray coverage also needs to be considered early in the design. Spray balls or other CIP devices need enough space to reach the required internal surfaces and avoid “shadowing”. Taller or more complex vessels may require additional spray devices or changes to the tank geometry. Side entry spray nozzles are an option.
Jacket coverage determines how much of the tank surface is available for heating or cooling. As tank volume increases, the available heat-transfer area per litre can decrease, so the jacket design needs to match the process requirements and working volume. Fluid turbulence is a major driver of efficient heat transfer in mixing tanks and reactors.
Surface finish and design standards can also influence the design. The required internal finish, referencing standards such as 3-A and AS 1210 where pressure applies, can affect material selection, fabrication and vessel geometry. HACCP requirements should also be considered where hygienic processing and contamination control are critical.
These factors should be addressed before the tank dimensions are finalised, rather than added as design changes later.
Transport, Site and Installation Limits
Tank size is influenced by more than required capacity. Shop-built tanks need to account for road transport, site access and installation, while larger vessels can be fabricated and assembled on site. There is no fixed capacity limit for site-built tanks, with projects potentially reaching 10 million litres.
For road transport, a vessel diameter of around 3.5 m is generally accepted. Larger diameters may require escorts, with exceptional loads requiring police assistance. Vessels up to approximately 7.5 m may be transportable but face significant route restrictions. In practice, overhead power lines, bridges, road geometry and site access can be more limiting than width regulations alone.
A 600,000 litre tank built on site at Mount Piper Power Station in Lithgow demonstrates how large vessels can be constructed at their destination, with crews staying on site from Sunday night to Friday night.
Before finalising dimensions, assess doorways, crane capacity, floor loading, installation space and potential future relocation.
Tank installation, relocation and future expansion of facilities should be factored into the tank design and location from the beginning, rather than treated as an afterthought.
Worked Example: Sizing a 22,000 Litre Batch Tank
Tank sizing is not simply a matter of calculating the batch volume and choosing the next standard tank size. The final design needs to account for the process, available space, mixing requirements, product characteristics, and safety considerations. In this example, the customer’s requirements were worked through before fabrication began, allowing the tank design to be adjusted as each process constraint was identified. The result was a tank designed around how it needed to perform, not just how much product it needed to hold.
- Step 1Initial requirement20,000 L mixing tank → smaller batches required → 3,000 L to 20,000 L
- Step 2Height constraintAvailable roof height = 6.5 m
Target tank height = 5 m
→ Tank diameter and height must be balanced within the available space. - Step 3Increased working volumeInitial capacity = 20,000 L
Revised working volume = 22,000 L
→ 22,000 L achievable without exceeding the height requirement. - Step 4Agitation requirementProduct must remain above minimum level for shaft seal → top-entry mixer selected
Mixing requirement = prevent settling + homogenise product
→ Agitation program adjusted to provide the required mixing intensity. - Step 5Product and safety requirementsFlammable product identified → determine hazardous area classification → EX-rated gearmotor required
AS 1692 applies → tank design revised accordingly. - Step 6Material and inlet changes304 stainless steel → 316 stainless steel for improved corrosion resistance
Additional ingredients + foaming risk → tangential inlet added

Mixing Tank Sizing Checklist
Use this mixing tank sizing checklist when preparing an enquiry for a stainless steel fabricator. Providing these details upfront helps the fabricator understand your process and recommend the right tank capacity, geometry, and mixing configuration.
- Daily production outputHow much product do you need to produce?
- Batches per shiftHow many batches are required to meet production targets?
- Batch volumeWhat volume needs to be processed in each batch?
- Product characteristicsWhat is the product’s viscosity and solids content?
- FoamingDoes the product foam or expand during mixing?
- Heating or coolingDoes the process require temperature control?
- CIP methodHow will the tank be cleaned?
- Applicable standardsWhich Australian or industry standards apply?
- Site limitationsWhat is the access, height, width, floor loading and crane constraints?
- Growth planWill production volumes increase in the future?
The more information you provide, the easier it is to size and design your mixing tank around your actual process requirements.
Frequently Asked Questions
What size mixing tank do I need for X litres a day?
Start with your required daily production, then divide it by the number of batches you can realistically complete per day. Allow for mixing, filling, discharge and cleaning time. For example, 6,000 L/day across four batches requires a 1,500 L working volume per batch. The final nominal tank size also needs sufficient headspace.
What percentage of a mixing tank is usable?
A mixing tank is typically not filled to its nominal capacity. For the majority of enquiries, dependent on the size of tank, an allowance of 50 to 200 mm freeboard distance from the top of the straight side of the tank to the full product level is what we work on as the working volume. The required level depends on the product, foaming, powder addition, agitation and process requirements.
Is a tall or wide mixing tank better?
The best tank geometry depends on your available space, batch volume and mixing requirements. Tall tanks can save floor space but may require longer mixing times, while wider tanks can suit higher volumes and provide easier access for cleaning. For dairy and food applications, STM typically uses a height-to-diameter ratio of around 1.5:1.
Can I use a storage tank as a mixing tank?
A storage tank is not automatically suitable for mixing. Mixing requires the correct tank geometry, agitator, impeller and baffles for the product and process. A tank designed only for storage may not provide adequate design in terms of strength as it wasn’t designed to support a mixer or the imposed loads from the mixing action. Additionally it may not provide adequate circulation or could create excessive vortexing, shear or dead zones. Check the tank and mixer as one system before converting it.
What is the largest stainless mixing tank that can be built in one piece and delivered?
Once a tank exceeds practical transport dimensions, road access and escort requirements become a key design constraint. Tanks up to 3.5 m in diameter can generally be transported without an escort, while larger tanks require increasing levels of escort and route restrictions, with tanks up to around 7 m possible in principle but highly route-dependent.
Get your tank sized
Send us your batch, product and site details and our design team will work through it with you.
